We were asked to bring art supplies for gifts rather than the "usual" gifts like toys and clothes. Of course, me being the crafty gal I am, LOVED this idea and I ran with it! This is what I came up with:

I filled a tackle box with all the artsy craftsy stuff a little girl could ask for: watercolors and brushes, various sizes and colors of pom poms, pipe cleaners, construction paper, foam stamps, glittered foam stickers, crayons, sidewalk chalk, various stickers, and alphabet post it notes. :)

I found the tackle box at Wal-Mart for just over $5.00 and managed to fill it with lots of crafty goodies. The whole kit cost less than $20.00.

You could also rummage through your craft stash to add items like scrap paper, stickers, etc. and save a few dollars! :)

I personalized the gift by cutting some vinyl with my Cricut. I love that the apostrophe is an artist's pallet.

I finished it off with a polka dot bow and a handmade artist's pallet gift tag and paint brush.

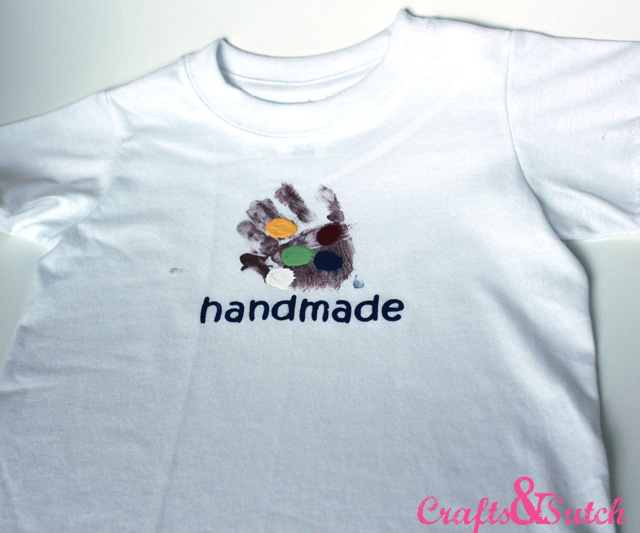
Because the kiddos were going to be "gettin' artsy," it was requested they come in clothes they could get dirty. I took this as an opportunity to make something new. :) Makes total sense, right? Kason and I made an artist's pallet t-shirt just for getting dirty. His hand print is the pallet and his thumb prints became the paints. The hubs came up with the "handmade" slogan. :)
The monkey's favorite station was the painting station. He stood in front of this easel for at least 30 minutes! Professional artist in the making if you ask me. :)

Here is his t-shirt after the party. While the paints used at the party are washable, I love the "new" look of his handmade shirt.

I might have to borrow this idea for the monkey's second birthday! :) He is definitely a creative little fellow!
I'll be linking this up to some of my favorite parties. See you all tomorrow for a double dose of Sutch an Inspiration!

Here are some of the best recent articles on Crafts:
Origami Craft Ideas: Origami Wedding Craft Ideas via Craft Supplies
Customizable Cross-Stitch Projects: Cross-Stitch Projects via Martha Stewart Crafts
Popular Trends in the Arts and Crafts World: Arts and Crafts Trends: An Overview was recently featured on online msw degree programs
Fun Spring Crafts for Kids: Spring Theme Crafts via Toddler Crafts




 Posts
Posts