Monday, February 28, 2011

St. Patrick's Day Messages {Printable}

Hello Sweet Friends!  Happy Monday!  I hope you had a wonderful weekend!  I was so very happy to be home.  I had a very rough time on Thursday and Friday traveling to Baton Rouge and back for work.  It was two days full of late planes, delayed flights, canceled flights, and a broken flip flop (you gotta love walking around an airport with one flip flop).  :)  Needless to say, I spent my weekend relaxing with my sweet boys!

I cannot believe tomorrow is March 1st!  I couldn't let you start the lucky month without this printable for your kiddos or sweeties...or whoever. :)


You know the drill...click on the image to open it in full resolution, right click and select Save Image As, save it, open the file, and print.  Then cut out the messages and drop them into your kiddo's lunch box or your sweetie's briefcase. :)

I wish you a lucky March!  See you tomorrow for some GREEN inspiration! :)  I'll be linking these sweet messages up at my favorite parties!


Photobucket

Friday, February 25, 2011

Add This - Make it Easy for Your Readers to Share Your Posts

Hello Sweet Friends!  Happy Friday! I'm so excited for the weekend because I've been out of town the past two days and Saturdays are my solo day with the monkey!  :) Can't wait for Mommy/Little Man date day!

I'm slowly but surely entering the social networking world.  :)  I love Facebook because it's familiar and now I finally feel like I'm getting the hang of Twitter.  I love social networking because it's an opportunity for me to share cool posts I see around Blogland, and be able to discover new blogs when other people share what they find too.

That being said, it's important to make it easy for your readers to show you off!  Holly over at 504 Main told me about AddThis, an easy-to-install (and FREE) tool that makes it super simple for your readers to share your posts to their favorite social networking sites!

Here's how to do it:

Head over to AddThis.


Now make your selections.  I selected no on number two because I use a different service for my analytics.


Highlight and copy the code in the text box.

Open your template HTML, and paste the code between the [body] and [/body] tags (please replace the []s with <>s; see green text below).


Once you have installed the code, the AddThis button should appear at the bottom of your posts (see below).  Now your readers can easily share your posts to their favorite social networking sites.

I love Blogland!  I love our community, and I love the friends I've made!  It's important that we support each other, so make it easy for others to show you off. :)

Have a wonderful weekend!  Guess whats coming up on Monday!  St. Patrick's Day lunch sack messages! :)  See you then!


Photobucket

Wednesday, February 23, 2011

Quatrefoil & Four Leaf Clover {Printable}

Are you in the mood for some luck?  I have never, ever decorated for St. Patrick's Day before, but the bloggy world does something crazy to me.  I won't be going all out...just adding touches of green here and there.  I wanted to create a printable that was simple and classic and I thought using quatrefoils would be appropriate since they are essentially four leaf clovers.


Isn't she lovely?  :)  She is all yours.  Simply click on the image above, click again to open in full resolution, right-click the image and select Save Image As.  Open the file, resize (if needed), and print.  This image file is huge, so you can blow this up to a poster size if you want to.

I hope this printable will bring you a little luck and get you in the St. Patty's spirit!  :)  I'll be linking up to these fantastic parties!


Visit thecsiproject.com


Photobucket

Tuesday, February 22, 2011

Sutch an Inspiration

Hello and Happy Tuesday!  I hope you're having a great start to your week!

There are so many fantastic things going on in Blogland that I found myself pulled in all different directions, so you'll find a little bit of everything today.

I guess I'm still all warm and fuzzy from Valentine's Day because I'm LOVIN' this LOVEly window display.  Emily from Made with Emily Love cut the word out of foam core and added some texture with spackling paste.  I'm already envisioning "Sutch" somewhere in my home!


WOW!  I love gawking over laundry room redos and this one over at The Exchange is no exception.  Cyndy's laundry room doubles as her craft storage room.  She shares some fantastic ideas for organizing all the "little" stuff that you accumulate as a crafter.  I especially love the tool caddy she uses to hold all of her brushes...and how about that subway art floor mat?


I've just recently discovered my love of vinyl!  I have no idea why I took so long to jump on the bandwagon, but now I'm on!  Michele over at The Scrap Shoppe has jumped on too and shared how she used vinyl to update some plain, white knobs.  I love this print and I can't wait to see her finished project!


How cute is this tool bench?  Natalie over at Johnny in a Dress and her hubs made this work shop for their little guy!  I love the peg board!  It makes it look "official."  I know when the monkey gets a little older he would love something like this!


Honestly, this was too cute to not share with you!  Do you know what he is made from?  Toilet paper rolls!  :)  What a fun and affordable project to do with your kiddos!  Sheri over at Childmade shares an easy to follow tutorial so you and your little one can "hop" to this project!


Ladies, thank you so much for sharing!  You are SUTCH an inspiration!

Please stop by tomorrow for a printable that will make you feel lucky!

Photobucket

Sunday, February 20, 2011

Veggie Chili

Hello Sweet Friends!  I hope you all had a great weekend!  The weather was perfect here in Texas, so we spent some time outside everyday.  Long walks, breakfast with a good friend, some delicious veggie chili, at home movie night with the hubs, and a trip to the park rounded out a fantastic weekend at the Sutch residence.  :)  What did you all do?

The hubs is one of those guys that thinks dinner is not dinner if there is no meat.  :)  Any other hubs like that?  Well, I decided to give a vegetarian meal a try to see if he would miss the meat.  Enter Veggie Chili!


I used this recipe from Kraft Recipes.com as a starting point and added my own flair.

Here is Kraft's recipe (my edits are in green):

What You Need

  • 1 can (28 oz.) whole tomatoes, undrained, cut up - (1 28 oz. can diced tomatoes)
  • 1 jar  (16 oz.) TACO BELL® HOME ORIGINALS® Thick 'N Chunky Salsa (I used a generic brand)
  • 1 can (15 oz.) black beans, drained and rinsed
  • 1 pkg.  (10 oz.) frozen corn - (1 16 oz. can of no salt added corn)
  • 1 cup halved zucchini slices
  • 1 tsp.  chili powder - (I used a boat load!  I would say at least 4 tsp.)
  • 1 pkg. (7 oz.) KRAFT 2% Milk Shredded Mild Cheddar Cheese, divided 
  • 1 small onion diced
  • 1/2 small green bell pepper diced
  • 1 tsp. cumin
  • a few sprigs of cilantro (optional)

Make It

SAUTE onions and green bell pepper until the onions are translucent and the peppers are soft
COMBINE all ingredients except cheese in saucepan.
BRING to boil on medium-high heat; simmer on low heat 10 min., stirring occasionally.
SPOON 2 Tbsp. cheese into each of 8 soup bowls; top with chili and remaining cheese.
FINISH with cilantro.

This recipe was super simple, quick, and delicious!  It's hearty and healthy!

Even the monkey loved it.  I just spooned his over some whole wheat pasta because he isn't a pro at using a spoon just yet. :)

Here is the monkey's reaction when I asked him if he liked his veggie chili:


LOL!  Take two!


For the record, the hubs did comment about the lack of meat, but I think it's only because I said it was veggie chili.  He still gave it two thumbs up though! :)

See you tomorrow for Sutch an Inspiration!  I'll be linking up to a few of my favorite parties!


Photobucket

Wednesday, February 16, 2011

Menu Organizer and Recipe Holder

Hi Beautiful Bloggy Friends!  I hope you are having a wonderful week!  I don't know about you, but I'm ready for the weekend!

I've been on a cooking kick lately.  I really do not like to cook, but I know it is so much better for my family and our pocketbook if I do.  I've been making a valiant effort.  I'll head over to KraftRecipes.com, pick out my dinners, add them to my shopping list, and print it out with all of the recipes.  A week's worth of recipes and a shopping list equal several sheets of paper, so I came up with a way to help keep my weekly menu organized.


This project was so easy!  Here's what I did:  a scrapbook paper covered file folder holds all the recipes for the week.  I glued the outside edges of the folder together to create a little pocket.  I used my Cricut to cut out the label and the letters and spruced them up with a little distressing ink.


I Mod Podged scrapbook paper onto a metal sign (I found mine on clearance at Michael's, but I've also found them at the Dollar Tree), used my Cricut to cut out the word DINNER, and made some satin rosette magnets.


The magnetic board is the perfect place to display the recipe for dinner that night.


Now for the best part!  I used 3M Command strips to adhere these to the inside of one of my kitchen cabinets.  This cabinet is right next to my stove, so it stays open while I'm cooking and my recipe is always visible and up out of the way (so it doesn't get covered in dinner). :)

This system has been working brilliantly!  It's so fantastic knowing that dinner is already planned, I just have to pick out what I want to cook.  What do you think?  :)

Have a great weekend, Everyone! :)  I'll be linking up to these super parties!


Photobucket

Tuesday, February 15, 2011

Sutch an Inspiration

Greetings, Friends!  I hope you had a spectacular Valentine's Day!  Yesterday was a little bit of a blah day for me and I wasn't feeling very Valentinesy, so I asked the hubs for a rain check.  :)  He was super sweet about it and brought me flowers anyway.  We had a little snuggle time on the sofa watching TV.  All in all, it was kind of perfect, but I'll be making our Valentine's Day dinner another night. :)

Anywhoodle...on to some inspiration!  It's been in the seventies the past two days here in Texas and so I'm loving all the touches of spring "springing" up all over blogland!

This Anthro-inspired headwrap from Bev at Flamingo Toes is perfect for the winter/spring transition. It's cozy to keep your ears warm and it has the best spring accessory...flowers! 

Another Anthro-inspired project is this lovely floral necklace.  The Anthro version is a whopping $198, but Mama Jill remade this beauty for just $6!  She has a fantastic tutorial if you would like to make one of your own.


This flower pillow screams spring to me!  Marian at Perfect Chance Memories used ribbon to create the flower.  I love this color combination!  Be sure to pop over to her blog to check out the back of this pillow...it's just as sassy!


Rachel at Bubbly Nature Creations crafted this Dahlia flower headband from an old, leather purse!  She even used the handles at the "band" part!  Talk about using what you've got!  :)  She has a super tutorial on her blog if you would like to make this stunner for yourself.


Okay, this next feature just makes me smile!  How cute is this "In the Mood" pillow from Nap Time Journal?  One side says, "In the mood" and the other side says, "zzzz."  :)  As for what side you would see on my bed, I plead the fifth! :)


Ladies, thank you so much for sharing these projects with us!  You are SUTCH an Inspiration!

Photobucket

Monday, February 14, 2011

Happy Valentine's Day

Happy Valentine's Day, Dear Friends!  I hope you have a day filled with LOVE! :)

Here are a few pics of my two loves...


Photobucket

Sunday, February 13, 2011

Heart Necklace

Happy Sunday, Friends!  Are you all ready for Valentine's Day tomorrow?  :)  I've decided to make dinner for Mr. Sutch and myself since the monkey will be home with us.  What are your plans?

Do you ever make something and then forget to post about it?  I made this Jeweled Heart Necklace back in January.


I saw it over at Martha's when I was checking out her site for Valentine's inspiration.  I made one, loved it, wore it, and completely forgot all about it until Jen from Tatertots and Jello showed off some she had made!  I love her addition of ribbon!  So cute and I like the punch of color!


I used black, smoky gray, clear, and light pink crystals.  I wanted something I could wear year-round and I wear a lot of black.  Then I threaded it onto a black chain.  Sweet and simple.


Wishing you all have a LOVEly Valentine's Day tomorrow! :)


Photobucket

Saturday, February 12, 2011

TWEET TWEET and a Printable Color Change

Hello Blogland Friends!  Guess what!  Crafts & Sutch is on Twitter!  I like to think of myself as pretty tech savvy, but Twitter is like a foreign world and it has me feeling like a total newb...not noob, newb.  There is a difference.  See?  Urban Dictionary says so:

Noob:  A "noob" is a person who is new or inexperienced in a subject, usually an online game. Noobs are usually annoying and excessively stupid.

Newb:  A term used to describe a inexperienced gamer/person/etc. Unlike a noob, a newb is someone who actually wants to get better.

I'm definitely a newb!  It may take a few days to get this whole @, #, RT, FT, etc. down, but I'm hoping to go pro by next week. :)

Now on to fun, free stuff!  A super duper fantastic reader asked for the But the Greatest of these is Love Printables in a few different colors.  So her request is everyone's gain!  :)


 Have a wonderful weekend!


Photobucket

Wednesday, February 9, 2011

Love Song Love Letters with {Printables}

February is just flying by!  I cannot believe Valentine's Day is right around the corner.  I'm so excited!  The house has little touches of red and pink here and there and I've just added the last decoration!  As promised, a project you will LOVE!


The original plan was to cover the letters L-O-V-E in old love letters that Mr. Sutch and I had written to one another, but I could not find them for the life of me.  ...and honestly now, I'm glad.  When I find them, they will be in tact and we can read through them and get all sparky. :)

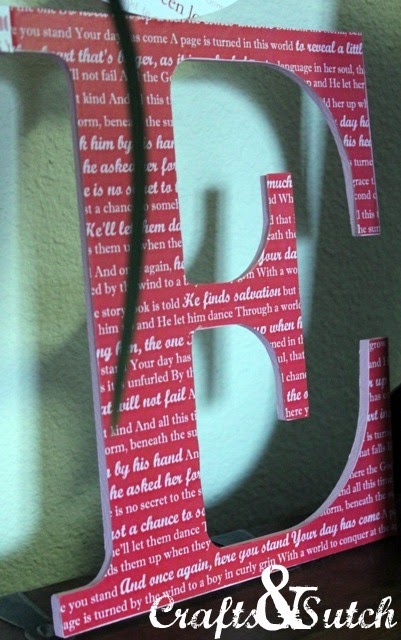
So plan B was to cover the letters in love songs that were special to the hubs and me.   I copied the lyrics into Photoshop, made them pretty, and printed them out.  Now on to the good stuff...

To get started, you will need printouts of song lyrics (love letters, etc.), Mod Podge, craft paint, letters (I got mine at Hobby Lobby), paint brush, foam brush, pencil, scissors, super duper glue, and a skewer or Popsicle stick.


Plan the layout of the design.


Turn over each printout and the letter.  Trace around the outside of the letter with a pencil.


Paint the outside edge of each letter.


While the paint is drying, cut out the letters from the printouts.


Use Mod Podge to glue the printouts on to each letter.


Turn the letters over and glue them together.  Be careful not to use too much glue in between the letters.  You do not want it to seep out the front.


Use skewers or Popsicle sticks to add stability and support to the letters.  Glue them in place.


Let the glue dry overnight, display, and LOVE!


 Here are the printables for the songs I used to complete the project.  Please feel free to print them out and create your own Love Song Love Letters, or just pop your favorite one into a frame!

Someone Like You by Van Morrison

The Reason by Hoobastank

Wonderful Tonight by Eric Clapton (Kathy, thank you for the suggestion)

Your Day Has Come by Bebo Norman

To print, click on the image, click again so it displays in full resolution, right click, and select Save Image As.  Then open the file and print. :)

I adore this project because every time I look at it, I flash back to my wedding night and remember how much fun the hubs and I had dancing to each of these songs and it makes me feel all swoony. :)

Have a wonderful Wednesday!  I'll be linking up to these fantastic parties!


Photobucket