Monday, June 28, 2010

Making It Match

Hello, and happy Monday!  I hope you all had a GREAT weekend!  I've been super busy trying to get the fam ready for a 10 day trip to Alaska!  I'm so excited, but also a little nervous since I'll have my nine month old, Kason, in tow.

Well, Alaska weather is definitely different from Texas', so I bought a ton of warm clothes for him in February on clearance.  I was able to get over 20 items from The Children's Place and Target for about $100!  What a steal, huh?  A few of the pants didn't have matching shirts, so that is what I've been doing...making shirts to match them.

Take a look at these cutie, plaid pants.  I loved them because they were summery looking (most winter gear is well, wintery...dark colors and heavy).

(click on any image to make it bigger)


I went to Babies R Us and found a pack of long sleeve onesies and decided to jazz them up to match the pants.  I used the little dinosaur patch as inspiration, so I cut up some old, khaki pants, found an image online, used a freezer paper stencil to paint the dinosaur (I used the tutorial from Holy Craft HERE), and then hand sewed the patch onto the onesie!  Too cute!


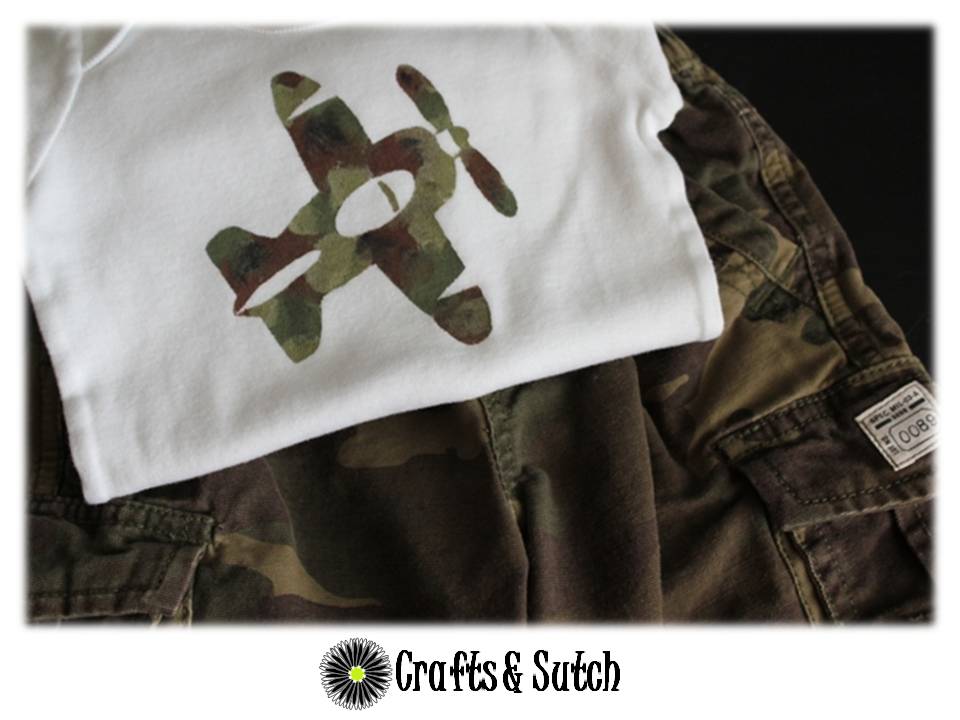
Here is another one I made to match a pair of camo cargos.  My little guy is going to be stylin' in his one of a kind onesies...made by mom! :)


Wishing you a happy week!  :)


Erin

Thursday, June 24, 2010

USA

Happy Thursday!  It's almost the weekend and that is always a good thing!

I love decorating my home for the holidays, but that usually only includes Halloween, Thanksgiving, and Christmas. My house is pretty much naked the rest of the year. :( Well, I decided that needed to change! :) I'm patriotic and I love the 4th of July, so I wanted to add some red, white, and blue flair here and there. Well, we all know how the FREEDOM banner turned out (if you don't, you can check it out HERE, and just so you know I'm hanging MODEERF with pride for this year LOL). So I thought I would give it another go with a simple USA banner. I absolutely love how it turned out!

(click on the image to make it larger)


I used wooden star cutouts, Mod Podged on some stripy paper and letters, connected the stars with wire, and added fabric scraps, ric rac, and some burlap ribbon. You can't tell from the pictures, but the ivory fabric has The Pledge of Allegiance written on it. Love it! :)

Thanks so much for stopping by today!  Have a super weekend!


Visit thecsiproject.com


Erin

Giveaway Winners!

Woowho!  Today is the day!  Thank you all for the wonderful ideas!  I'm still a blog newbie, so all the advice and tips are so very much appreciated!  Only one comment was required for entry so for those that left more than one, I only counted your first comment to make it fair.  Drum roll please...The winners are:

Kristyn @ The Laughter Family, Angela @ A Mama's Two Cents Worth, and Cara @ Cara's Scrap N Stamp Art!


Congratulations, Ladies!  I'll be in touch with you to discuss shipping information.

Thank you all for participating and for being followers of Crafts & Sutch, you are so very AWESOME!  Another BIG congrats to the winners of the necklaces! :)  Have a most fabulous weekend!


Erin

Wednesday, June 23, 2010

Last Day to Enter 30th/3 Week Giveaway! :)

Hey there, and happy Wednesday!  Remember today is the last day to enter the 30th/3 Week Giveaway!  Woowho!  There are going to be three winners, so your chances of winning are spectacular!  Our winners will receive this super, sweet necklace hand crafted by me. :)


Click HERE to enter!  Good luck!  The winners will be announced tomorrow!


Erin

Monday, June 21, 2010

Kid Craft: Faux Stained Glass

Hey, All!  I sure hope you had a wonderful weekend!  I had a SUPER 30th!  Thank you for the birthday wishes!

This project was inspired by my niece, Kylie.  I was over visiting my sister and her family when I saw a great, little piece of artwork Kylie had done in art class.  It was a big letter K with a mosaic background and it looked like stained glass.  I asked her how she had made it, and then I decided to give it a whirl.

Here is what you will need:  aluminum foil, an image to be copied, a piece of cardboard or cardstock, Scotch tape,  black tape (or duct tape), transparency paper, scissors, and permanent makers.


First, I found an image HERE.  I copied the image into PowerPoint and enlarged it to fit an 8 1/2 x 11 piece of paper and printed it out.  I taped the image behind the transparency paper and traced around the outside with a black permanent marker (the faux lead).


After I traced around the outside of the image, I removed the printed sheet from behind the transparency paper, turned the transparency paper over, and taped it to plain, white paper (you should be coloring on the opposite side you traced the outline). 

Now fill in your image with colored permanent markers.


 Once you have colored your entire image, cut out a piece of aluminum foil to the same size as your transparency paper.


Crumple up the foil (not too much), gently unfold it, and press it flat.


Now take your transparency paper and lay it on top of your foil. Back it with a piece of cardboard or cardstock and tape around the perimeter or you could place it in a frame.


This project is super great for your older kiddos!  They can pick out any image or even draw their own, and they can color it any way they want to! 

Have a fantastic week!  Don't forget to sign up for the 30th/3 Week Giveaway by clicking HERE!


Erin

Thursday, June 17, 2010

30 & Three Week GIVEAWAY!

Woowho!  Today is my birthday!  I'm 30!  I'm so excited!  I've been looking forward to this day for a while.  :)

One of my presents on my birthday and three week blogging anniversary is over 100 followers!  Holy WOW!  I must say I'm shocked and just so very thankful! :)  I love crafting, sharing, but most of all, I love seeing what you are doing because your ideas give me my inspiration!  ...sorry to get all mushy on you! :)

Anywho, without further ado, I'm having my very first giveaway celebrating my most fabulous followers!

I thought it would only be appropriate, on my 30th and 3 week anniversary to have THREE winners, yes, THREE!   The prize is a sweet and simple necklace handcrafted by yours truly!


Entry is very, very simple:
Be a follower of Crafts & Sutch and leave a comment on this post telling me one blogging tip.  I'm still new, so tips are welcomed and appreciated.

It's as easy as that.  The winners will be selected using random.org one week from today, June 24th (so you have until Wednesday, June 23rd to leave your comment).

Have a happy day!  I'm off to eat cake!


Erin

Wednesday, June 16, 2010

Butterfly Birthday Beach Bucket

Hello!  Happy Wednesday! :)

My friend's little girl is having a birthday party this weekend, and Kason will be bringing Miss Ryleigh a super cute beach bucket filled with beach/pool goodies!

I got inspiration from Yesterday on Tuesday.  She made these adorable, personalized beach buckets.


I already bought the goodies to fill the bucket, and one of the items was a butterfly beach towel.  It was instant inspiration for my chalkboard.

I drew out a butterfly on contact paper.


Folded it in half, and cut out around the image.


I then affixed the contact paper to the bucket and sprayed it with chalkboard paint.


 Tada!  :)  I outlined the butterfly and added some polka dots with paint pen.


Personal, affordable, and easy...always a good recipe!  This gift came in under $10.00! 

Have a wonderful rest of your week!  Come back tomorrow for a giveaway announcement!


Erin

Tuesday, June 15, 2010

Blog Hoppin', Baby!

I'm participating in the Tuesday Tag Along Blog Hop hosted over at Twee Poppets! Join in on the festivities and hop around...find some new friends, and follow along! :)


Happy Hopping!

Erin

Monday, June 14, 2010

Antique Spool Redo

Happy Monday, Everyone! :)  I hope you all had a super fun weekend!

I bought these beauties when I was visiting a friend in the Texas hill country.


They've been on my coffee table and my mantle, and I finally decided they needed a little flair to brighten them up...and bring a some life to the living room.

A little scrapbook paper, jute, buttons, and a paper flower later, this is what's on my mantle now.  :)


Here is a close up.


I used double sided tape, so I can change these up whenever I feel like it. :)  The same technique (haha, this so isn't a technique)...okay, the same idea can be used on any accessory that needs a face lift...candles, vases, etc.  :)

Have a wonderful week!


Erin

Friday, June 11, 2010

Two Weeks & Picture Holder

I can't believe that it's already been two weeks since I entered blogland!  I've been having so much fun!  I'm just excited that you guys are liking coming to visit me as I much as I like sharing projects and visiting your blogs too!  Thank you so very much to the followers of Crafts and Sutch!  There will be a very special giveaway opportunity for you ladies soon!

Now on to the fun!  I found some wooden spools at Michael's a few weeks ago, and thought, "I can make something with that."  At .79, they were a steal!  :)

I came home and turned them into these darling picture holders!

(click on any image to make it bigger)
Here is what you'll need:

Paint brush, Mod Podge, craft paint, wooden spool, scrapbook paper, wire, wire cutters, scissors, hot glue gun, and embellishments.


I painted the top and bottom of each spool and then cut some scrapbook paper to fit in the middle.  Then I Mod Podged the paper onto the spool.


I embellished each one with ribbon, buttons, or rhinestones.


I used jewelry wire for my spiral, but you could use anything heavy gauge that you have on hand.  Mine is 20 gauge.  Just be sure that your wire is strong enough to stand up and hold a picture.  I cut about 8-10 inches of wire and wrapped it around a marker (3 to 4 times) to make my spiral.  Then I put a dab of hot glue on the bottom of the spiral to keep the wire together (you will cover this later).


To make the wire stand up in the middle of the spool, I wrapped a small piece of paper towel around the bottom.


I pushed the paper towel wrapped wire into the hole and secured it with hot glue.


I added an embellishment to the top of each wire spiral...either scrapbook paper flowers, buttons, or rhinestones.  I think they turned out so darn cute!  :)


These would make super cute gifts, and I think they would be adorable place card holders at a "Cute as a Button" baby shower.  It kind of makes me want to throw one.  :)  Anyone pregnant?  LOL!

...just think of the possibilities...if you can stick a wire in it or wrap a wire around it, you've got a picture holder!  My mind is reeling!

Have a most wonderful weekend!


Erin

Tuesday, June 8, 2010

Dry Erase Message Frame

I've seen these all over blogland. Of course as soon as I want to post some inspiration, I can't find a single one!  Live and learn...bookmark things I want to remake.  :)  Does anyone have a good process for that?  :)

I got the frame at Hobby Lobby for 50% off (I love HL!  They always have everything on sale).  I added some scrapbook paper, jute, buttons, stamped on the words Notes and Sutch, and ended up with a super cute dry erase message center.


Here is a close up of the top.


My little guy, Kason, has his own spot for special messages from Mommy and Daddy...so what if he's 8 months old and can't read.  :)


Enjoy!  Have a wonderful rest of your week! :)

Erin

Saturday, June 5, 2010

Bad Craft Day

Have you ever had a bad craft day?  Well, I had one today and I have to tell you, it's not so much fun.  This post will make you laugh and cry...from laughter!

I made this super cute bracelet last night!


Totally FUN, right?  So I woke up and started working on another one for a tutorial.  Well, it was a colossal bust...literally.  It busted open.  See.


So needless to say, I took a brake from the fabric covered bracelet.  It is salvageable, and there will be a tutorial...some day.  :)

On to craft project number two, a banner for Father's Day!  It's Keith's first Father's Day and I wanted to make it really special!  I thought an "I love Daddy" banner would be perfect!  Then I had a stroke of genius!  I thought, "Why don't I make this two-sided?"  I decided to put I "heart" Daddy on one side and Freedom on the other.  I "heart" Daddy can hang until Father's Day and Freedom could be displayed for the rest of June and early July.  Holy cow!  What a great idea!  See take a look.


Adorable!

And now here's the other side.


My stroke of genius turned into a very, ugly blond moment.  :)  Freedom turned into Modeerf...not really a patriotic word.  When you put the start of one word on the back of the start of the second word (does that make sense), it doesn't work out so well.  :)  I can laugh about it...now.


I will definitely attempt the two-sided banner again because it is pretty fantastic.  I'll just be more careful next time!  My day wasn't a total bust.  The I "heart" Daddy banner turned out perfect and I learned a GREAT lesson!  :)  LOL!

Erin