Showing posts with label flowers. Show all posts

Friday, November 19, 2010

Fall Decorating {Credenza}

Happy Friday!  I'm so ready for this weekend!  We are celebrating Thanksgiving with my mom and sister early this year, so I'll be chowing down some turkey in two, short days!  Woowho!

I've decided that my home is as decorated as it's going to get for fall.  Here is a little vignette I put together on top of the credenza in my entryway.


I won this adorable Itz Fitz wreath a few months ago over at Mandpidy


A wire pumpkin, a bundle of wheat, and a raffia-wrapped antique spool acting as a vase are grouped together on one side of the credenza.


While this fantastic fall tree topiary, chocolate pumpkin, and Itz Fitz wreath sit clustered together on the other side.


I love seeing this as soon as I come in the front door.  It makes me happy!


As much as I love all of my fall decorations, they will be coming down this week to make room for Christmas!  :)  Have a wonderful weekend!


Photobucket

Monday, November 15, 2010

Fall Decorating {Mantle}

Hello and happy Monday!  I hope you all had a wonderful weekend!  Mine had a rocky start with a sick baby, but got better and better throughout the weekend. 

Last night I finally finished up my mantle!  I had taken down the Halloween stuff at the beginning of the month but struggled with this look until now.  :)

The staple on the mantle throughout the fall is the berry garland.  It is full of red, orange, and yellow berries and I stuff it a little more with fall leaves, and small pumpkins and gourds.  Then I pulled out this antique window pane (which has been sitting in my garage since I bought it a few years ago) and hung a beautiful fall wreath from the top with an orange ribbon. 

On either side of the window pane, sit chocolate pumpkins (see side note below), glass beaded pumpkins, and sunflowers.


Side note:  Do you ever feel like you share crafty brain waves with someone?  :)  Sometimes I'm hunting around blogland and see a project that is exactly what I had envisioned making or someone will leave a comment, "I was just going to make that!"  It goes to show you that great minds think alike!  I think Michele, from The Scrap Shoppe, and I were sharing crafty brain waves when we both decided to spray paint pumpkins brown!  Check out her's HERE.  She turned her brown pumpkin into a fall vase.


I decided to give these guys a coat of spray paint because they were cream and got lost against the creamy wall.  I wanted something dark and appropriate for fall so brown was the way to go (plus I already had a can from spray painting Kason's nursery furniture).  Then I dressed each one up with an orange ribbon.


Coming up this week:  Sutch an Inspiration, my fall credenza, and our Christmas card! :)  Have a fantastic week!


Photobucket

Friday, November 12, 2010

Fall Breakfast Table

I love this time of year.  I love the colors.  I love wearing warm and cozy sweaters and boots (haven't been able to do this just yet).  I love to fill my home with fall and all it's elements.

I bought these place mats on clearance at Kohl's a couple of years ago.  The variety of shapes and colors is a very "me" thing...just take a peek at my chairs. :)


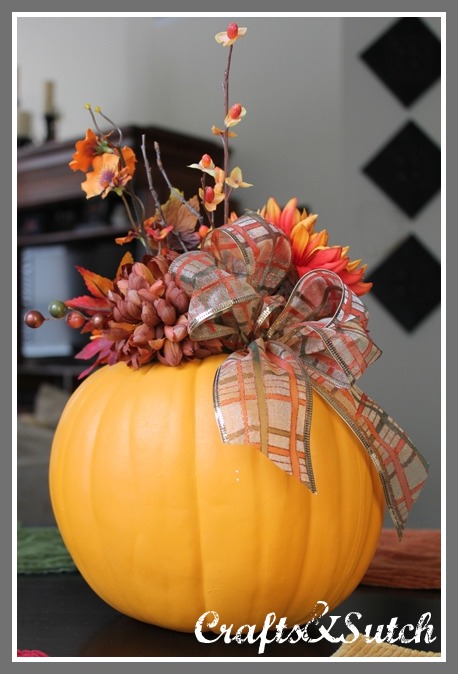
My mom and I made some pumpkin center pieces for friends and ourselves a couple of years ago (another Ike crafting day).  We bought all of our supplies at Garden Ridge on sale BB (before blogging).  We cut a hole in the top of carvable pumpkins, filled them with fall colored flowers and berries, and finished them off with big, beautiful bows.  They turned out spectacularly!


I spied a few similar pumpkin center pieces at Michael's the other day with an $80.00 price tag (they didn't look as good as ours... :) just saying).  Wowza!  Don't be afraid to make your own.  If it doesn't look right the first time, take the pieces out and try again (the little block of floral foam in the middle of that pumpkin has too many holes to count).

I'll be linking up to some of my favorite parties found HERE!

Photobucket

Saturday, September 25, 2010

A Sweet Necklace

Hey, Everyone!  I hope you are all enjoying a relaxing weekend!  I thought I would hop on while the little man is napping to show you a necklace that I made with the help of my friend, Kristyn.  Did you know that I make jewelry?  I know.  You would never know because I haven't made anything in a very long time.

Anywho, Kristyn wanted a unique and personal gift for a friend's birthday.  She picked out all of the components and helped with the design.  I think it is absolutely perfect.  I love that it is casual, but could easily be dressed up for an evening out and I especially love how the pendants are tied together in the center with a bow.  So sweet!  What do you think?  :)  Would you like to see some more jewels?


I hope to see you all back on Monday for EEK Weeks!  I have to tell you Monday's project is the best by far (to me anyways) and it's a double feature...not one, but two fantastically fall projects!  :)  Have a great rest of your weekend!

Linking up to all of my favorite parties HERE!


Photobucket

Tuesday, August 31, 2010

LOFT Inspired Shoes

Prepare to fall in love...  I was out shopping at the mall on Friday and I came across these lovlies at LOFT.  Aren't they adorable?  With a price tag of $69.50, they were just out of my price range.


Well, you know what happened, don't you?  The "I can make that" syndrome kicked in, and well, I did!  :)


 Would you like a pair too?  Well, get out your glue gun because here's how to do it:

You'll need:  4 - 12 in. x 2 in. strips of tulle, 2 felt circles, feathers, 4 poly satin circles (2 big, 2 small), a rosette, 2 clip on earring clasps, scissors, needle, thread, glue gun, and a lighter.


Let's start by pleating a strip of tulle and forming it into a circle.  Secure the circle with a few stitches from a needle and thread (or hot glue).


Gather, pleat, and turn until you make a full circle.  I used two tulle circles per shoe for volume.


Next, take your poly satin circles and singe the edges with a lighter until they curl up and look like petals.  You will need one small circle and one large circle per shoe. I believe my diameters were approximately 3" for the large circle and 2" for the small circle.


Now it's time to layer.  Start with the felt, glue on your feathers, tulle, big poly satin circle, small poly satin circle, and then your rosette.  You could add a button to the middle of the flower like the inspiration, but I chose to keep mine simple and sweet.  NOTE:  I found my rosette in the remnant section at Hobby Lobby.


After you have assembled your flower, turn it over and hot glue on your clip on earring.  NOTE:  The end of the clasp might be uncomfortable on your toes.  You can put a little piece of felt over the back or use a different type of clip, like an alligator one.


I bought my ballet flats at Wal-Mart on clearance for $7.00!  Talk about taking a ho-hum pair of shoes and making them look like a million bucks!


And because we used a clip, we can take these beauties off and put them on a headband, on a sweater or jacket, or on a handbag.  I love items that serve double or triple duty!  Versatility is my middle name.  :)


This project was so simple, and affordable...not to mention adorable.  Isn't it great making your own version of something because you can custom tailor it for you.  I love my all black version of these shoes.  I will get so much more use out of them.  I have the black flats in brown too, so I'm off to make another pair.

Now go make yourself some LOFT inspired sassy shoes! :)  If you do, please send me a pic!  I would love to see your creations! :)

I'll be linking up to these super parties!


Photobucket

Wednesday, June 2, 2010

Wrapped Wreath

I've been exploring craft blogland for a few months now, and have been so inspired (my husband would say too inspired).  Here is a project I saw, loved, and needed to make immediately...meaning no time for a trip to the local craft store.

I found this super cute, wrapped wreath at The Scrap Shoppe


Isn't is scrumptious?  Michele has so many fantastic tutorials on her site, and my to do list instantly grew when I found her blog.

Things I loved about the inspiration:  the monogram, that it was wrapped, and the flowers!  As I said, I needed to recreate this immediately, so I just used what I already had. 

I used jute, ribbon, silk flowers, buttons, and a metal S to create my version.  


I absolutely love it!  It makes me smile every time I walk through the front door.  :)  Thank you, Michele, for the inspiration!


Erin

Thursday, May 27, 2010

Office Mural

Well, here I am! I'm so excited to make my very first post to my Crafts & Sutch blog. I've been truly inspired by so many crafty women in my life, and just recently discovered the craft blog world. Wow! I want to be a part of it too! :)

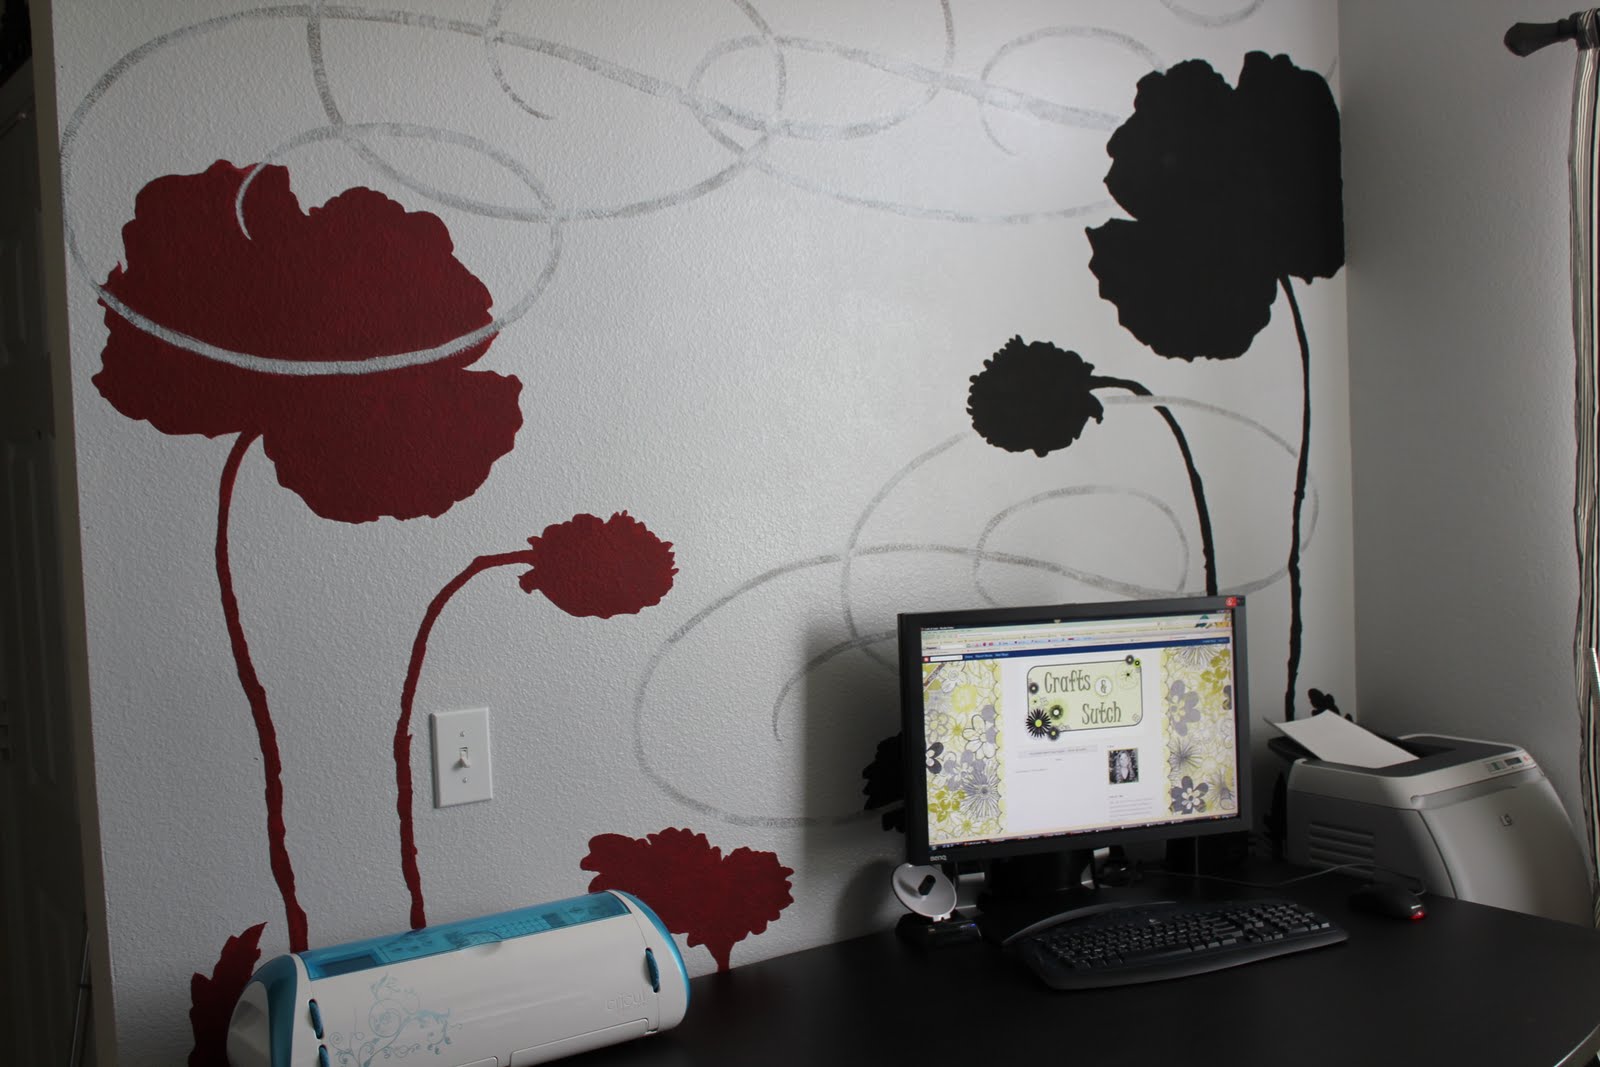
My first post has been a labor of love and has taught be sometimes Plan B is way better than Plan A. This past year I started to work from home and I needed a space that I wouldn't mind spending a lot of time in. I decided to paint a mural on one wall. I'm not an artist, just someone with a crafty bone and who isn't afraid to try something new.

I found an image on Google images of some modern flower silhouettes. I came up with my color scheme, and printed out my image. I borrowed a projector from my mom and traced the image on my wall (you could rent a projector from a teacher supply store or ask a teacher friend). I painted it with your normal, run of the mill craft paint and simply filled in the lines! Easy peasy!

As soon as I painted the swirls, I knew they were way too busy and needed a softer appearance. I took the wall paint and dry brushed over the swirls to give them a distressed finish (Plan B).


I love how it turned out! The total cost for this project was $6.97 ($2.98 for three bottles of craft paint and 3.99 for some paint brushes)! Not too shabby for a work of art!

Linking up to these super cool sites:

The Girl  CreativeShow and Tell GreengiveawaysHookingupwithHoHPonyTails and FishScales
Get your craft on Thurs.The Girl CreativeFollowMeFridaysDecor Mamma
Simply Designing sweetcharli"Favorite%2BThings%2BFridaybig%2Bbutton.jpg


Erin